Categories
Build a block quilting scraps

Werquilters: Build a Block 9 patch turned 4 patch

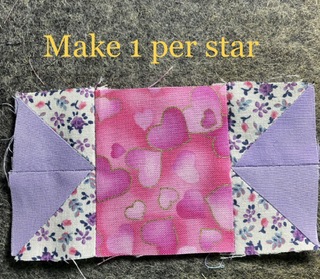
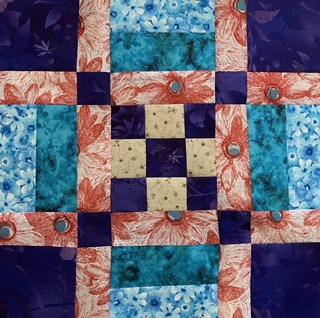
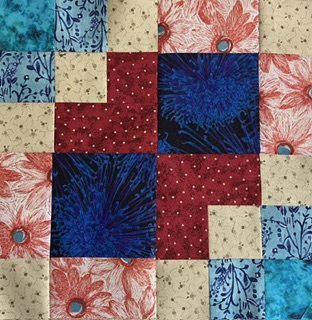
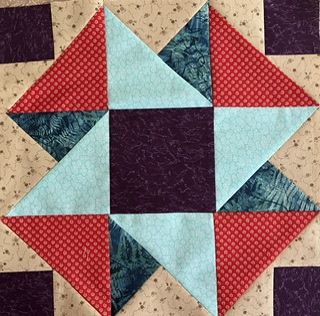
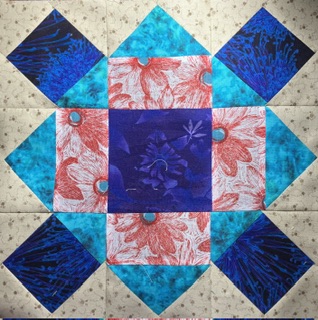
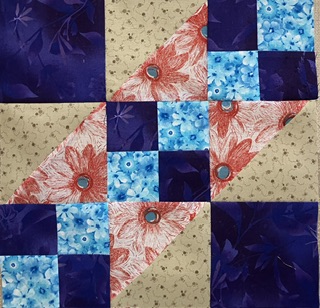
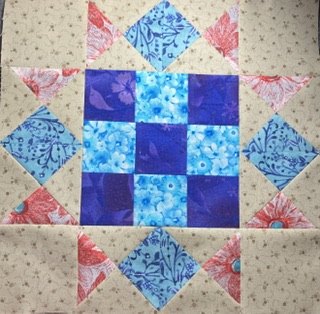
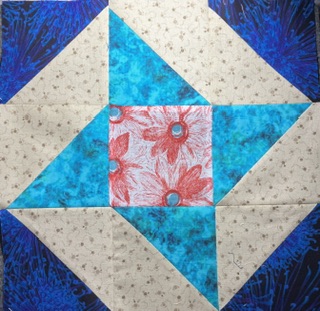
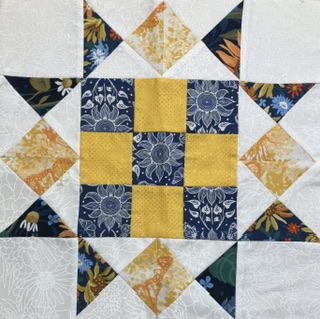
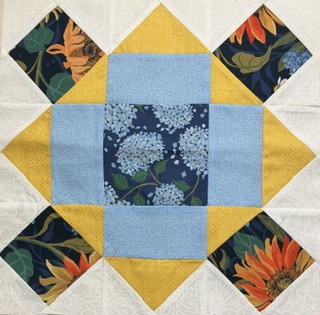
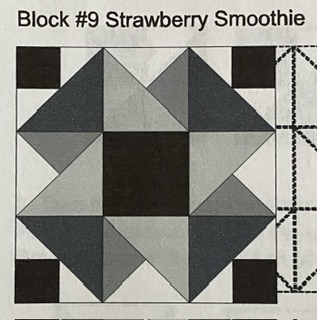
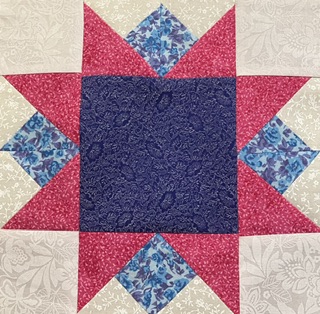
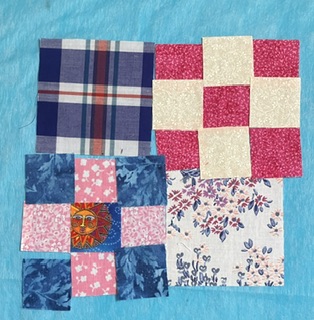
It is time to use up some more of those scraps! Let’s make another basic block…9 patches added to larger squares to create a 4 patch. These blocks are versatile. When set together, they make an adorable scrap quilt. See my YouTube short showing this same block. It is part of my series on using up bonus half-square triangle blocks.

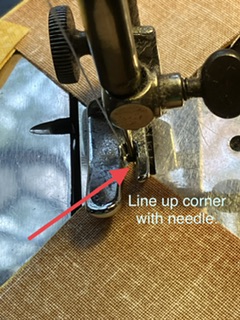
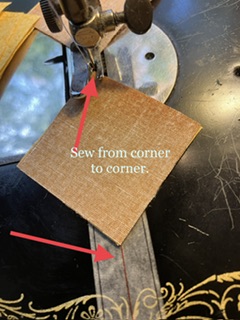
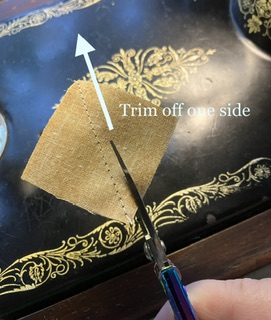
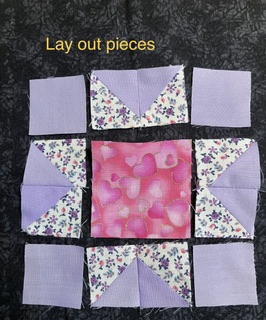
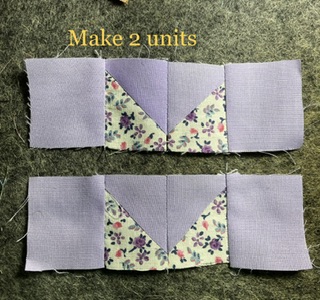
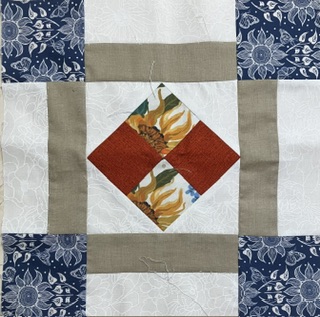
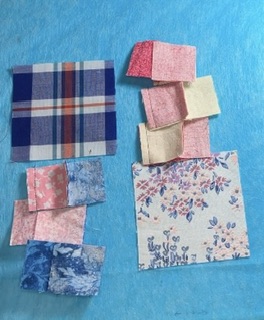
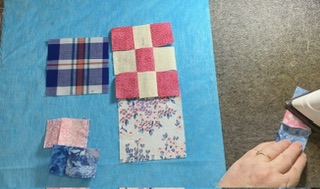
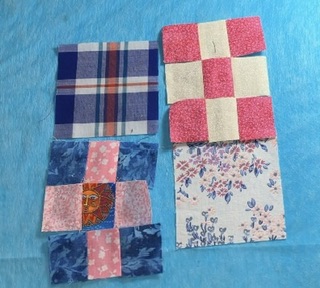
Here is a block waiting to be sewn. You will need the following pieces to make this 6 1/2″ block:

  • 2- 3 1/2 inch squares
  • 18- 1 1/2 inch squares to make both nine patch blocks

This block could easily be made in a variety of sizes: 12 1/2″, 18 1/2″, etc.

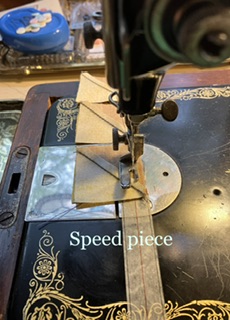
Start by speed piecing the rows of the nine patches.

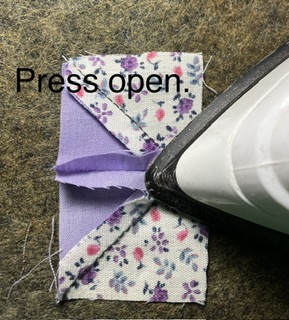
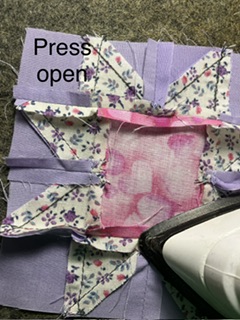
Press the seams open…if you wish.

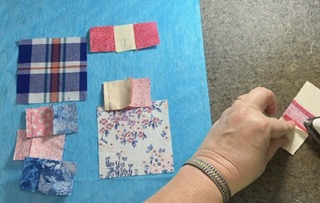
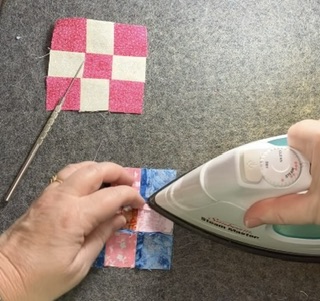
Sometimes I use my fingers to gently pull on the block so I can get the seam open to press it. Without burning my fingers, of course.

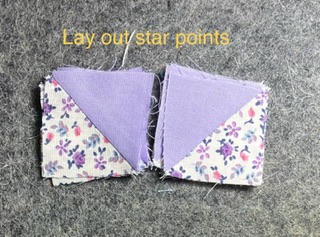
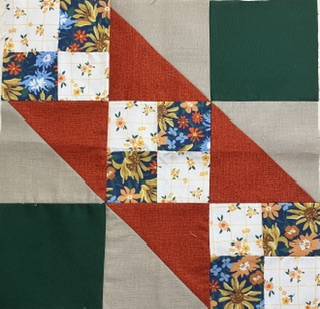
Look at those nice, little rows. Sew the rows together.

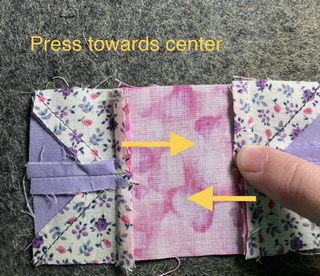
I press these seams open, too. It cuts down on the bulk and the blocks lay flatter.

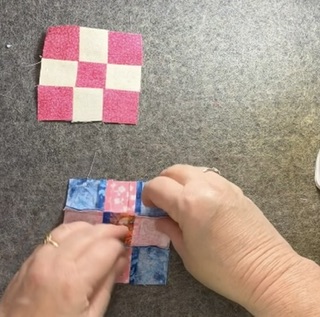
Occasionally, I have difficulty getting those seams open. I have a stylus…actually it is a dental tool from the hardware department of a flea market…that helps me grab the seam.

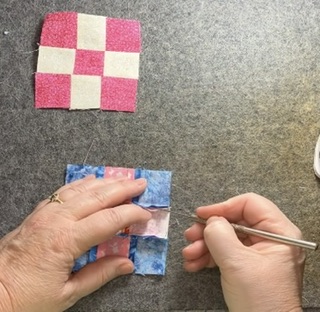
You can see my stylus a little better here in this picture.

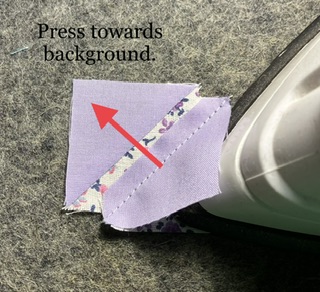
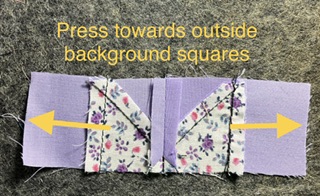
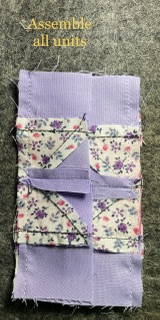
After the 9 patches are ready, sew the bigger blocks to them. Press towards the larger block.

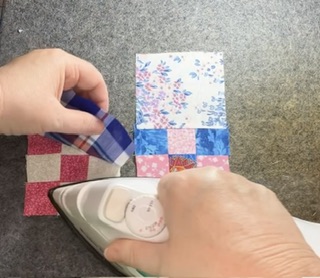
When you turn the block pieces around, the seams will nestle.

Press the seam whichever direction you so desire…or open if you want.

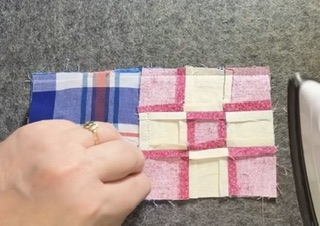
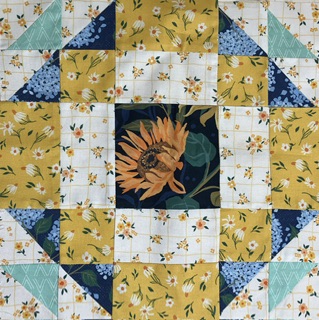
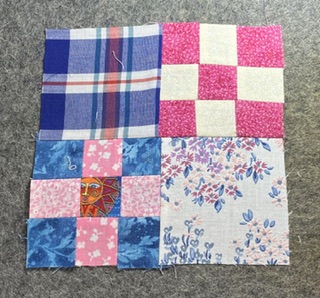
Tah-done! What a cute little scrappy block!

What blocks have you been making to use up your scraps? Please comment below. I can’t wait to hear from you!

Later,

Lorrie

Categories
Build a block quilting scraps

Werquilters: Build a Block Scrappy Star

This week, I am adding a second block, the scrappy star. It is pictured here as a 4 1/2″ block. It could easily be made into a 8 1/2″, 12 1/2″ or 16 1/2″ block.

This tutorial reads like a picture book. I learned how to edit photos! Many of the directions are right in the picture. This also matches my YouTube short that shows how to use up some of those bonus triangles we all have. Most of the pictures are the same as those in the video, too.

Here is the finished star:

I have been making these as leader/ ender blocks for the entire summer. I have a nice little pile going.

The first image is parts you need if you don’t cut triangles to make this block. The directions are in the pictures below to make the triangles from squares. Just look for the tan and yellow squares.

This second picture, with the lavendar background, is the number of pieces that you need if you ARE cutting the triangles. I use an accuquilt die to cut those little triangles, but it is not necessary to have one of those to cut pieces.

The easiest way to make any block, is to lay out the pieces before you start.

The first sewing step is to make the 8 half square triangles, whether you are using triangles or squares.

The images with brown fabric are constructed from squares.

I love the washi 1/4″ tape. It doesn’t leave a residue. It stays on for a long time. There is a lot of it on a roll.

Now that your star points are sewn, it is time to press.

Background fabric should be towards the inside. Star points should be on the outside.

Sew the star point pieces together in pairs.

I prefer to press these seams open to reduce bulk. You can press the seams to the side if you prefer. I know this is a controversial topic in the quilting world. No judgements here!

Lay your pieces out again. This is a double check of your star points, etc.

You have the parts assembled for all 3 rows.

Time to finish the block. Sew the rows together.

Again this is to reduce bulk in these little seams.

Here it is again…the cute, scrappy star block.

I hope you are enjoying making little scrap blocks. There are many more blocks to come!

What is your favorite scrap block to make?

Later,

Lorrie

Categories
Hale Country Quilters quilting scraps sewing

Hale Country Quilters BOM update

I am slowly making progress on this block of the month. Here is block seven, eight and nine.

Janice did a great job with the directions on this one! Thank you, Janice! I changed the color placement from the original pattern to make the red pop out a little more.

I changed the middle reds on this block so that they looked like hearts. The original block only had one red.

This block had a lot of little tiny trimming to make it fit perfectly. Once it was trimmed, it was easy to assemble. There is a lot of swirl going on there!

Are you working on any “installment” projects? Please share! I love hearing from you!

Later,

Lorrie

Categories
Build a block quilting scraps

Werquilters: Build A Block 4 x 4 Scrap Block

  • You will need 16 blocks of your choosing for this block. Choose one of the following sizes for the best results: one and a half inch, 2 1/2 inch, 3 1/2 inch or 4 1/2 inch. Block should I have a nice contrast between them.
  • Lay the blocks out in a 4 x 4 formation like the illustration above.
  • Sew the blocks in each row together. You will have four rows.
  • it is now time to press the seams of your block. There are two options. You can press the seams to one side or the other or you can press the seams open. I recommend pressing the seams open even though this seems counterintuitive. It creates a flatter block in the long run. I have never had any problems with weaker seams because of pressing seam allowances open.
  • Sew the rows together.
  • Press, the row seams.
  • Enjoy your block!

Later,

Lorrie

Categories
Hale Country Quilters quilting travel

BOM Hale Country Quilters Update #2

Recently, I have been trying my best to catch up with the blocks of the month from Hale Country Quilters. Slowly, but surely, I am getting there! Whew!

I am loving the teal, purple and red combination in each block.

Block 4
Block 5
Block 6

I am going to take a little break before I start the next block. Block 7 has a bunch of small pieces…and I changed the color placement just a little bit…so I need to have my head in the game!

What project are you catching up on this weekend?

To help you relax, I am sharing a sunrise picture over Lake Huron from our recent trip to Mackinaw City, Michigan.

Enjoy your weekend!

Later,

Lorrie

Categories
Hale Country Quilters quilting sewing

BOM Hale Country Quilters Update

I am making slow, but steady progress on my BOM for the Hale Country Quilters group.

I would have more of the blocks completed if I hadn’t had an epiphany. Darn those epiphanies!

I decided to make a center big block from a Pat Sloan sew along. I like this big star block.

Then I saw a block on Pinterest. It was screaming at me to be 16” corner blocks.

Here are the first three BOM installments.

Are you participating in any BOM’s this year? They are a great way to build skills…and if you don’t love the top when you finish it, it can become a gift or charitable donation. Someone will love it for you! 💕♥️💕

Later,

Lorrie

Categories
quilting sewing

I am a YouTuber!

I have been watching a lot of YouTube videos since I retired…quilting, cooking, bargains, and crafts.

I started to think about this after watching a video on the New Retired Me channel…also produced by a retired teacher.

I don’t want to substitute teach to make extra money. Why not be a YouTube star? 😎

Check out my first video here.

Thank you in advance for your help and support!

Later,

Lorrie

Categories
quilting scraps

BOM Hale Style

Recently I joined Hale Country Quilt Guild. I have only been to 3 meetings, but I am enjoying this experience. At the last meeting, I shared my Sweet Childhood Memories quilt tops. The ladies made me feel so good!

Sheryl, my wonderful Up North neighbor, invited me to a meeting because she knows how much I love quilting and sewing. When we joined, the BOM was on the 10th out of 12 blocks.

Sheryl has several blocks completed. I love her colors! So pretty! I love the Autumn colors and earth tones with a touch of blue she chose.

I needed some time to make this project more complicated. Yes…that means I have not started the blocks yet. I am using teal, purple and a touch of red.

However, I have all the setting blocks completed for the quilt in my head. I am using the large center start from Pat Sloan’s Festivals and Fireworks quilt sew along.

I am using a block I saw on Pinterest for the four 16” corner blocks. Here is a link to the free, printable pattern. It is called Blue Ridge Mountain Star.

Just as a side note, look at all of these bonus half square triangles!

Here is a quick snapshot of the patterns:

I like that the patterns all use 1 background and a light and dark of two colors. The directions are well written thanks to Janice Berg. I love playing along with friends. Time to get to work!

What are you working on today?

Later,

Lorrie

Categories
sewing thrifting/ yard sale

Look what I found!

I love yard sales! Yesterday we found this for $20! The seller thought about making it into a table…oh, the horror!

It is a White. I don’t know much about this brand. All the mechanisms are loose…nothing frozen or locked up. There are many, many YouTube videos about them. Thank goodness!

The drawers are in good shape. Only one little spot of veneer damage.

The decals are in good shape.

This is the back before I cleaned the wood. Beautiful!

Do you see the ruler inlaid in the wood case? Fantastic!

It was a little dusty underneath. It came with a nice ball of lint. It cleaned up easily.

I wiped it down with machine oil. What a beauty! I need to bring my treadle book back with me so I can put a new belt on it. (There is a new belt in one of the drawers.) I also need to watch some videos about threading it.

Oh, this will not be a table on my watch!
What wonderful treasures did you find recently?

Later,

Lorrie

Categories
quilting sewing

Just a little something…

This week has been a travel week. I have worked on a few things…not much. Here are a few pictures of works in progress:

I made these pieces last summer in 2022. I am finally going to put them on the border where they belong.

I will add more of these flowers once I get these ones sewn down to the background. Oh, did I mention there are four borders, not just these two?

This block is from Pat Sloan. It is part of the fireworks quilt along that is just ending. It has this center square that I have decided to use in a block of the month quilt.

This picture has two outside borders on it. Next I will add the blocks for the month and big 16 inch corner squares. My colors are purple, teal, and a bit of red.

This is a practice block for the center of each cornerstone block of that same quilt. The section with the blue and purple square is actually made up of two triangles, which makes it a bit of a challenge.

Hope you are living your best life and doing things that bring you joy!

What are you working on during these last toasty days of summer?

Later,

Lorrie